Getting Started With MicroProfile Config using Payara Micro
In this tutorial we will learn how to use MicroProfile Config API using Payara Micro
MicroProfile Config API can be used to retrieve configuration information from different sources.
Tools You Will Need
Maven 3.3+
Your favorite IDE. I'm using NetBeans
JDK 1.8+
Generate Project
We will use Payara Micro Maven archetype to generate our project, run the following command.
$ mvn archetype:generate -DarchetypeGroupId=fish.payara.maven.archetypes -DarchetypeArtifactId=payara-micro-maven-archetype -DarchetypeVersion=1.0.1 -DgroupId=fish.payara.micro -DartifactId=microprofile-config-example -Dversion=1.0-SNAPSHOT -Dpackage=com.kodnito.mpconfig -Darchetype.interactive=false
Open pom.xml and add the following :
<dependency>
    <groupId>org.eclipse.microprofile.config</groupId>
    <artifactId>microprofile-config-api</artifactId>
    <version>1.3</version>
</dependency>
Here we add MicroProfile Config API dependency to our project.
MicroProfile Config
Inside src/com/resources/META-INF/ create microprofile-config.properties file and add the following :
username=root
password=secret
microprofile.apis={"config", "cdi", "jax-rs", "json-p", "fault tolerance", "healt check", "jwt auth", "metrics", "openapi", "opentracing","rest client"}
Inside src/com/java/com/kodnito/mpconfig/ create ApplicationConfig.java file and add the following :
package com.kodnito.mpconfig;

import javax.ws.rs.ApplicationPath;
import javax.ws.rs.core.Application;

@ApplicationPath("/api")
public class ApplicationConfig extends Application {

}
Now create HelloResource.java inside the same package with the following :
package com.kodnito.mpconfig;

import java.util.HashMap;
import java.util.Map;

import javax.enterprise.context.RequestScoped;
import javax.inject.Inject;
import javax.ws.rs.GET;
import javax.ws.rs.Path;
import javax.ws.rs.core.Response;

import org.eclipse.microprofile.config.Config;
import org.eclipse.microprofile.config.inject.ConfigProperty;

@RequestScoped
@Path("/hello")
public class HelloResource {

    @Inject
    @ConfigProperty(name="username", defaultValue="admin")
    private String username;

    @Inject
    Config config;

    @GET
    public Response hello() {
        Map<String, Object> configProperties = new HashMap<>();

        configProperties.put("username", username);
        configProperties.put("password", config.getValue("password", String.class));
        configProperties.put("microprofile-apis", config.getValue("microprofile.apis", String[].class));

        return Response.ok(configProperties).build();
    }
}
@Inject @ConfigProperty annotation is used for injecting a single configuration property and we supply a default value.
@Inject Config here we are injecting the configuration object and we use getValue() method to retrieve the configuration property.
Your final project structure should look like this :
tree .
.
├── pom.xml
└── src
    └── main
        ├── java
        │   └── com
        │       └── kodnito
        │           └── mpconfig
        │               ├── ApplicationConfig.java
        │               └── HelloResource.java
        ├── resources
        │   └── META-INF
        │       └── microprofile-config.properties
        └── webapp
            └── index.html
Inside your project directory run the following command to start the Payara Micro server.
$ mvn package payara-micro:start
Now, enter http://localhost:8080/microprofile-config-example-1.0-SNAPSHOT/api/hello in browser's address bar and see the output.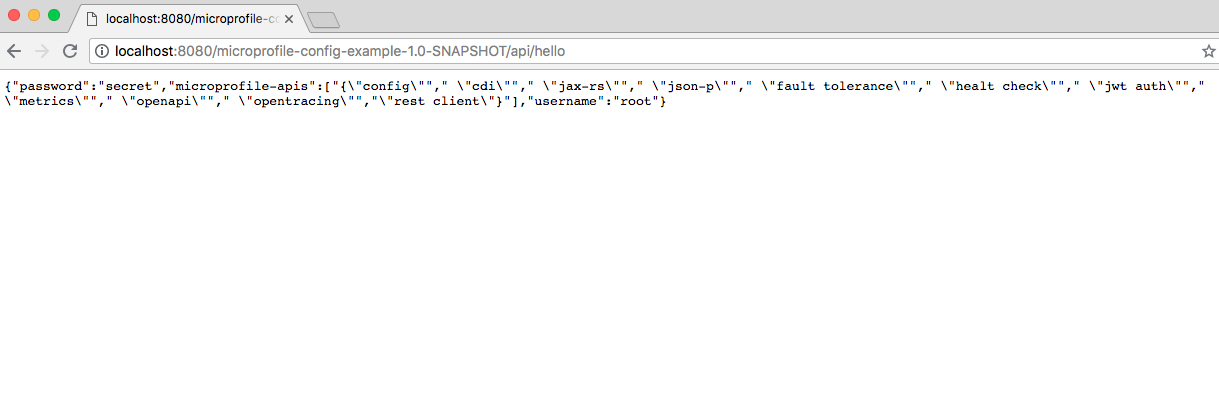
Share this: