Spring Boot Thymeleaf Introduction
In this tutorial, we are going to create a simple Spring Boot web application with Thymeleaf template engine and H2 database.
Tools You Will Need
Maven 3.3+
Your favorite IDE. I'm using NetBeans
JDK 1.8+
Creating the Project With Spring Initializer
Go to start.spring.io and follow the steps below to generate a new project.

Enter the Details as Follows
Group: com.kodnito
Artifact: spring-boot-with-thymeleaf
Dependencies: Web, Thymeleaf, DevTools, H2, JPA
The DevTools enables hot swapping and live reloading.
Click Generate Project to generate and download your project.
Next, Unzip the downloaded zip file and import it into your favorite IDE.
Thymeleaf template files are located in the src/main/resources/template directory by default.
Create a simple entity class inside com.kodnito.springbootwiththymeleaf.model package as follows:
Todo.java
package com.kodnito.springbootwiththymeleaf.model;

import javax.persistence.Entity;
import javax.persistence.GeneratedValue;
import javax.persistence.GenerationType;
import javax.persistence.Id;
import javax.persistence.Table;
import javax.validation.constraints.NotBlank;


@Entity
@Table(name = "todos")
public class Todo {

    @Id
    @GeneratedValue(strategy = GenerationType.AUTO)
    private Long id;
    @NotBlank
    private String task;
    private String description;

    public Long getId() {
        return id;
    }

    public void setId(Long id) {
        this.id = id;
    }

    public String getTask() {
        return task;
    }

    public void setTask(String task) {
        this.task = task;
    }

    public String getDescription() {
        return description;
    }

    public void setDescription(String description) {
        this.description = description;
    }

    @Override
    public String toString() {
        return "Todo{" + "id=" + id + ", task=" + task + ", description=" + description + '}';
    }

}
@Entity annotation indicates that it is a JPA entity
@Table annotation is used to name the table in the database
@Id annotation is used to define the primary key and the Id property is also annotated with @GeneratedValue to indicate that the Id should be generated automatically.
@NotBlank annotation is used to validate the field is not null or empty.
Configure the Database
Open /src/main/resources/application.properties and add the following properties to it.
spring.h2.console.enabled=true
spring.datasource.url=jdbc:h2:file:~/test
spring.datasource.driver-class-name=org.h2.Driver
Create Data
Let's populate some data, create /src/main/resources/data.sql
insert into todos
values(1, 'Learn more Spring Boot', 'Spring Boot is awesome');

insert into todos
values(2, 'Go buy milk', 'I drink coffee with milk');
Next we're gonna create a repository to access data from the database.
Create an interface called TodoRepository inside com.kodnito.springbootwiththymeleaf.repository package and extend it from CrudRepository
TodoRepository.java
package com.kodnito.springbootwiththymeleaf.repository;

import com.kodnito.springbootwiththymeleaf.model.Todo;
import org.springframework.data.repository.CrudRepository;

public interface TodoRepository extends CrudRepository<Todo, Long> {

}
CrudRepository interface defines methods for all the CRUD operations.
Creating TodoController
Create a controller class inside com.kodnito.springbootwiththymeleaf.controller and add the following to it.
TodoController.java
package com.kodnito.springbootwiththymeleaf.controller;

import com.kodnito.springbootwiththymeleaf.model.Todo;
import com.kodnito.springbootwiththymeleaf.repository.TodoRepository;
import org.springframework.beans.factory.annotation.Autowired;
import org.springframework.stereotype.Controller;
import org.springframework.ui.Model;
import org.springframework.web.bind.annotation.GetMapping;


@Controller
public class TodoController {

    @Autowired
    TodoRepository todoRepository;

    @GetMapping("/todos")
    public String getAllTodos(Model model) {
        Iterable todos = todoRepository.findAll();

        model.addAttribute("todos", todos);

        return "todos/alltodos";
    }
}
We inject the TodoRepository with the @Autowired annotation.
@GetMapping annotation maps /todos HTTP GET requests to getAllTodos() method.
getAllTodos method calls CrudRepository's findAll() method to retrieve all the todos from the database and return the entire list.
We add todos attribute to the Model object and passes the value to alltodos view.
The View
Create todos folder inside /src/main/resources/templates and inside todos create alltodos.html
alltodos.html
<!DOCTYPE html>
<html lang="en" xmlns:th="http://www.thymeleaf.org">
    <head>
        <meta charset="UTF-8"/>
        <title>Todos</title>
    </head>
    <body>
        <h1>My Todos</h1>
            <table>
                <tr>
                    <th>Id</th>
                    <th>Task</th>
                    <th>Description</th>
                </tr>
                <tr th:each="todo : ${todos}">
                    <td th:text="${todo.id}">id</td>
                    <td th:text="${todo.task}">task</td>
                    <td th:text="${todo.description}">description</td>
                </tr>
            </table>
    </body>
</html>
To access data, we use the ${} variable expressions.
We iterate over the list of todos and put each todo details into one table row.
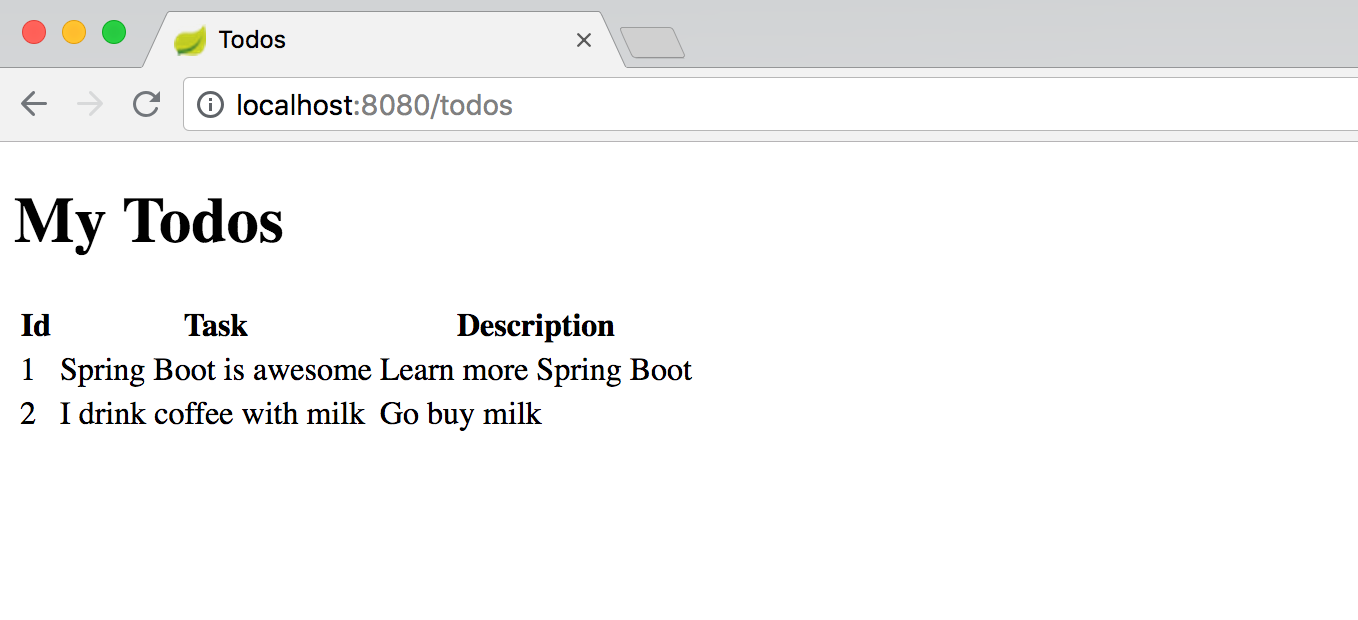
Now, enter the http://localhost:8080/todos in browser's address bar and see the output.

Share this:

